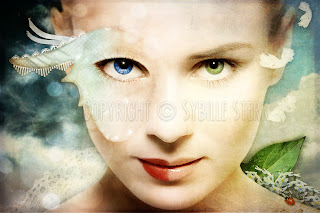
There are many ways to blend images for photo manipulations in the various image editing programs. The examples here are all done in Photoshop CS4, however variations of this should work in other programs.
The first step is always to choose the right images and to prepare them, check out my my tutorial
Tips & Tricks for Photo Manipulations
One method to prepare images for the foreground is to use masks. Masks can be used in a variety of ways, not just for isolating objects from their background but also to blend them. So here's some info on masks.
Masks
Using masks for preparing images
This has one big advantage over other methods. Unlike other methods it's easy to undo a mistake when you remove too much of the object. I find it also easier to get closer to those areas that are not quite object and not quite background especially if you use a soft brush. Other methods you could use for this step is the Extract filter (not available in some versions of PS and other programs), pencil tool, magic wand, colour select etc. Find the one you are most comfortable with.
Here's how to use the mask:
- Open your image.
- If it is a JPG or other flattened image, use Duplicate Layer and create a copy of the image above the original.
- Make the original image invisible so you can see what you are removing with the mask (just click on the Eye button next to it).
- With the new layer active, click on the Mask button. Another rectangle is shown next to the original image in the layer dialog.
- In the toolbar select the Brush tool. The colours at the bottom change to black and white.
- Now you can start removing the background. Use a large brush to remove the bulk of the background, then use a smaller brush to remove the background close to the image.
- In the next step I add a new layer below the masked layer and fill it with black. This shows me any areas I might have missed. I do the same again with a white layer.
- Once you're happy you can either right-click on the mask (make sure it's selected) and click on apply mask to remove the masked area or keep the mask.
- Sometimes it's useful to keep the mask as it will allow you to make changes to it later or enables you to select the object and fill it with a texture. More of that later.
sybillesterk.jpg)
sybillesterk.jpg)
sybillesterk.jpg)
sybillesterk.jpg)
sybillesterk.jpg)
- Should you remove part of the object you can always change the brush colour to white and paint in the masked area. Change back to black to remove more.
- Use a brush with a soft edge as it will leave an area of low opacity around the object that will allow it to blend better with a background. You can always remove unsightly areas that show on your chosen background later on. However, if your mask is too perfect it often will look like a 'cut-out' in a paper collage, rather than part of the whole.
Using masks to blend images
Masks of objects are invaluable if you want to fill your object with a texture which won't affect the background.
- Click on the mask in the layer to make sure it's active, then right-click. See the menu below. You can apply the mask, and do all sorts of other stuff, however, the one you want for this is Add Mask to Selection. Click on it. You can see the marquee around your object.
- Open the texture image next.
- Select it, then copy it.
- In the mask image, click on Edit, Paste into and paste your texture into the object. You'll notice that PS automatically creates a new layer with a copy of the original mask.
- Select the Move tool in the tool box. You can rotate, scale or modify the texture image now. Warp works well on curved objects
- Use the blending modes and change the opacity to achieve the desired affect.
- Here I've pasted an image of the background into the masked selection and used the blending mode 'colour' to blend the colour of the chain with the background:
Using gradient masks
Gradient masks are a fabulous tool to blend two or more images together.
In this example I've chosen an image of the sky to blend into the image so far.
- Open your image, select it and copy it into the current image.
- Click on the mask button with the image you just copied as the active layer.
- Select the gradient tool in the toolbar. Ensure the gradient tool is the one where it is black on one side and transparent on the other.
- Make sure the mask is selected and use the gradient tool. Experiment. You may need to apply the gradient tool several times on various areas to achieve the desired effect.
In the image you can see I used the gradient to remove the bottom part of the sky image leaving just the top. The blend mode is Screen. I also moved it behind the chain layer.
Using Channels
Channels are very useful as you can select only parts of an image easily and use them as textures. It works particularly well with clouds or texture images with high contrast.
- Open your texture image.
- Select the Channels tab.
- Select the channel with the highest contrast (in my case it's the red channel).
- Hold down CTRL and click on the chosen channel. The progam now selects all the lighter areas for you.
- Copy and paste the selection into your image.
- Move the image into position and use a soft eraser if necessary to remove parts of the texture image that you don't want. Choose a blend mode. Overlay or screen work well with lighter textures like clouds. With other textures or depending on your image and the effect you want to achieve, multiply may work too.
Tip:
Sometimes it may prove necessary to enhance the contrast on the image you want to use this way – use
Levels or
Brightness/Contrast to achieve a high contrast image.
You can invert the selection in the channels tab by pressing
CTRL+I to select the darker areas instead of the lighter ones.
Using Textures
Textures can be used in many ways – to add colour, to give coherence to a manipulation that includes several images, to add texture and interest, to age, to give a grungy look... the possibilities and effects are endless.
- Open your texture image.
- Select and copy it
- Paste it into your image.
- Play with the blending modes until you have one that works. Don't forget to adjust the opacity.
I mostly use
Multiply,
Overlay,
Soft Light and
Screen, however sometimes I find others work better.
- Colour is great if you make your texture image the top layer if you want to, for example, age your image. Choose a brownish texture image in this case.
- Pin light is good if you want to add a 3D effect to your image, however, it works only with a fairly high contrast texture image.
In this image I've added a picture of sand and used overlay to bring out the colour of the sand and add a little texture.
Tips: Try changing the colour of your texture image using the Hue/Saturation dialog or increasing the contrast by using the Levels dialog. You don't have to limit yourself to just one or two textures in your image, use as many as you feel you need to create the effect you're after. Use the gradient masks to apply them to only part of the image or masks to apply them to particular objects or areas of your image. Each texture as you apply it will be affected and will affect the other textures and layers of the image, so make sure you save your image after each stage.
Using Gradients
I often use gradients and masks on the gradients to intensify the colour in one area of the image.
- Create a new layer. Ensure the layer is at the top in the dialog.
- Choose your gradient. One colour plus transparent or one colour plus white. Use the colour picker to select a colour from your image.
- Fill the layer with the gradient.
- Change the blending mode.
You can use
plain fills in the same way to intensify the colour of your image, to darken it, or to bring out details. Play with it.
Other tips:
If the definition of your object gets lost when you apply different textures and effects, duplicate the object layer, choose
Overlay or
Soft Light for the blending mode and then use a
Gaussian blur on it. If the colour is too intense, turn down the saturation of the duplicate layer.
You can also duplicate your object layer, then
desaturate the layer and make it as
dark as it will get. Move it below the original layer, then use
Gaussian blur to create a soft shadow. Use overlay or multiply and adjust the opacity for a shadow effect that will give your image more depth.
Play with the commands in the
Filters,
Render menu. Clouds works really well, especially if you use the Radial blur on it to create sunbeams. Check out
Anna's tutorial on how to make rays of light.
Tip: With all filters your can use the
Edit,
Fade command to change the blending mode and opacity of the filter effect.
There are lots more things you can do to blend images together to make a successful photo manipulation:
- Use a soft eraser (soft edges + low opacity) to blend hard edges into the background.
- Use lighting effects (Filters, Render, Lighting Effects) on the background or texture images to give your image depth.
- Use the channel mask method on your object to increase the contrast of the object and bring out the light source of the original image.
Mainly it's all a matter of trial and error. I save after each stage and leave my masks until I am sure I am finished before applying them.
Finished image
© Sybille Sterk - all images and text my own. Please do not copy. Feel free to link to this tutorial.


sybillesterk.jpg)


sybillesterk.jpg)
sybillesterk.jpg)
sybillesterk.jpg)
sybillesterk.jpg)
sybillesterk.jpg)
sybillesterk.jpg)
sybillesterk.jpg)
sybillesterk.jpg)
sybillesterk.jpg)
sybillesterk.jpg)
sybillesterk.jpg)
sybillesterk.jpg)
sybillesterk.jpg)
sybillesterk.jpg)
sybillesterk.jpg)
sybillesterk.jpg)
sybillesterk.jpg)


